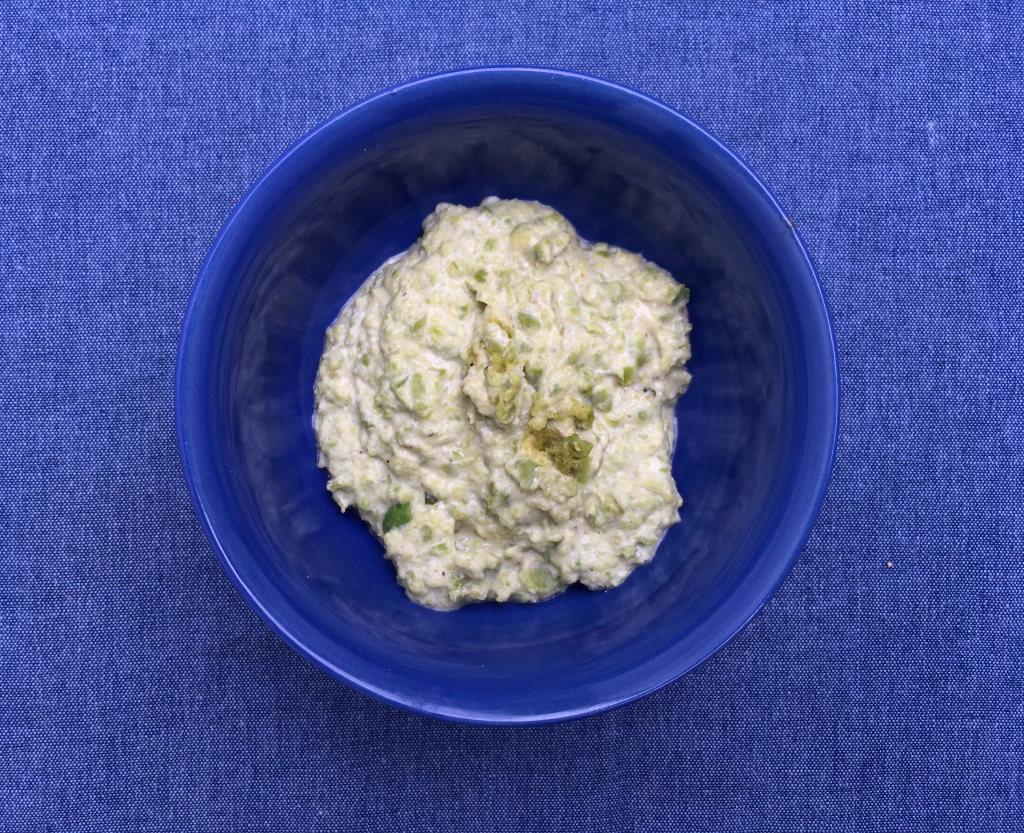
Sikil P’ak
Mayan Roasted Tomato & Pumpkin Dip
Before us Mediterranean, Middle-Eastern and even Northern Europe inhabitants claimed the tomato as one of the fruits defining our food cultures, this divine berry was a staple of the Mayan diet. Its ancient Mayan name is P’ak. In Nahuatl cultures ingesting the seeds of the tomato berry was considered a divine blessing – its name closer to its worldwide term nowadays is ‘tomatl’. This dip or as some of guests called it ‘tomato and nut butter’ hails from the olden times of South American food heritage. My recipe was inspired by the infamous Diane Kennedy, whose books on Mexican cuisine are a precious ethnography of the land’s food culture. You can use raw, un-peeled pumpkin seeds for one third of the quantity of pumpkin seeds used here. If you do be careful to NOT use salted ones and you might need to increase the water quantity used. I prefer to play safe and to use organic peeled and home roasted seeds.
What
(yields approx. 500g dip)
- 350g ripe tomatoes
- 160g pumpkin seeds
- Half a habanero or Hungarian hotwax or jalapeño chilli pepper (optional)
- 65-85ml water
- 15g fresh coriander leaves finely chopped
- ½- 1tsp salt
- 2 pinches of smoked or plain salt
- Juice of half a lime
- Handful of chives, roughly chopped or some parsley
How
- Place the washed & dried tomatoes a non-stick pan with a couple of pinches of salt. Preferably use ripe cherry or small plum tomatoes whole. Other tomatoes should be sliced in half.
- Roast the tomatoes on high heat for the first five minutes and then lower to medium heat to cook until soft in the middle, usually for another five minutes.
- Whilst the tomatoes roast, place the pumpkin seeds in another non-stick pan and toast for a few minutes until they start popping. Make sure you regularly shake the pan to avoid burn.
- Set aside the pumpkin seeds to cool down (5 minutes).
- Whilst the pumpkins are cooling down dry toast the chilli pepper until it browns in spots and softens.
- Using a coffee or spice grinder blend the toasted pumpkins to a fine meal.
- In a food processor place the tomatoes, chilli (if using), the ½ tsp of salt, the coriander and some water. Blend until well mixed.
- Transfer the pumpkin meal and tomato mix into a bowl, add the lime and mix well. You can also mix in the food processor if big enough.
- The mixture should resemble a mayonnaise dip in consistency or a thin hummus.
- If you don’t mind a chunkier dip, you can make the dip in a large stone pestle and mortar. Starting with the grinding of the seeds, then the tomato and pepper and then the other ingredients.
- Taste and adjust seasoning if necessary.
- Mix in the lime juice and garnish with the chives.
- Serve with nachos as a starter or beer snack.
Herbal Muddle Cocktail for Green Squirrel
In May 2021 we were approached to create a summer garden inspired cocktail for the celebration of the work and successes of our friends at Green Squirrel. We spend time at Global Gardens project, a community allotment and growing space, run by some other friends. With cold weather and rains we were unsure whether the herbs and fruits we anticipated to draw inspiration from would arrive in time. Then suddenly at the end of May the global gods and sunlight smiled upon us. We found inspiration in walks and talks at the garden with one of the growers Poppy. Wild strawberries and the many varieties of mint thriving at the sunbathed garden oasis in the heart of Cardiff gave us the idea for a cocktail you can make anywhere with just a jar, a penknife and some good quality booze! Enjoy!
Here is the video we made for Green Squirrel and below is the recipe!
What
- One small handful of wild strawberries OR a large & ripe strawberry or two
- 6 mint leaves (Moroccan or spearmint are best) OR 4 sprigs of salad burnet
- 1 tsp. sugar
- 1 large wedge of lemon (1/4 lemon)
- 1 double shot of white rum
- 1 Tbsp. orange liqueur or triple sec
- Sparkling or soda water
- 4 ice cubes
- A pestle or wooden rolling pin for muddling & crushing
- A jar with a lid (250-300ml)
- A strainer or small/tea leaf sieve
How
- Throw the wild strawberries or chopped Chilean strawberries into the jar.
- Add the herb of your choice, the sugar and whole wedge of lemon.
- Using the pestle or wooden rolling pin edge crush and muddle all the ingredients for a good few minutes to get the lemon juice out, cream the strawberries and help the herb oils and flavours come out.
- Add the rum and liqueur. At this stage you can set the jar aside to infuse for a while. You don’t need to do that.
- Then add the ice and shake vigorously for a couple of minutes.
- Remove the lemon wedge, squeezing all the good flavour and lemon/booze juice out with your fingers.
- Using a strainer (cocktail or mini sieve) pour into a glass (preferably chilled).
- At this stage you have a short and very strong cocktail which you can sip slowly for a quick way to tipsiness and merriment.
If you prefer a lighter and fresher version add some chilled sparking or soda water, at least 1/3 of the cocktail quantity in the glass or to the top of the glass for a longer version.
Behind the scenes
Here is a video of the place that inspired us!
USE-WHAT-YOU-HAVE MOUSSAKÁ
As a person who grew up in Greece I get asked for Moussaka recipes all the time. Moussaká is really as diverse as each household. Go to http://www.instagram.com/lias_kitchen to read what differentiates Moussaká from other bakes!
In this post we want to demystify one of the most popular dishes of modern Greek cooking. My usual béchamel sauce is one where milk is flavoured with mace or nutmeg in advance and then slowly heated whilst you slowly add flour, butter and one egg. Not really a roux method but something we call Kourkoúti. But to make things simple for you we recommend you make a béchamel (or morney) sauce you know how to make and have provided a link to a BBC recipe.
In the past year I have made Moussaka with what I have. I always have uncooked lentils in my store cupboard and love using them for a vegetarian, use-what-you-have version of the dish. Use 300 to 500g of minced beef if that’s what you prefer. The authentic Moussaka in my mum’s kitchen uses two layers of aubergine but potato is just fine particularly when your vegetable box has too many potatoes you need to use up.
Enjoy our delicious recipe below!
What:
⁃ 3/4 to 1 cup or mug uncooked lentils (brown or green or black)
⁃ 1 onion, chopped
⁃ 3 allspice berries, crushed (optional)
⁃ 1/2 cup white wine
⁃ 3 to 4 garlic cloves, finely shopped
⁃ 1 tin chopped tomatoes
⁃ 500ml hot water (2cups)
⁃ 30g chopped parsley
⁃ Bay leaf (optional)
⁃ 1 egg beaten
⁃ 1/2 cup breadcrumbs
⁃ 250g crumbled or greater goat or ewe’s cheese such as feta, Abergavenny goat, manchego, pecorino or graviera.
⁃ Salt
⁃ 1 béchamel portion of your choice
⁃ Mace + bay leaf or just grated nutmeg to flavour
⁃ Half kg potatoes or as many it takes to fill a medium baking tray, sliced in circles of 1.5 to 2cm thickness
⁃ Mix of vegetable and olive oil to shallow fry
What:
1. Soak the lentils for an hour or two (optional).
2. Start with making the lentil filling.
3. Fry the onion in 2tbsp. Olive oil with a pinch of salt for 5min.
4. Add the drained lentils, a pinch of pepper and the crashed allspice berries and fry for a couple of minutes.
5. Add the wine, stir and follow with the tinned tomatoes & hot water.
6. Add another couple of pinches of salt, the bay leaf (if using) and the chopped parsley.
7. Cover and simmer for 30.
8. Whilst the sauce is simmering make a béchamel portion of your choice and fry the potatoes till mostly cooked.
9. Use 2-3 Tbsp. Vegetable oil and 2 Tbsp. Olive oil to fry the potatoes.
10. Make sure to cool down the lentil sauce before adding the beaten egg, cheese or mix of cheeses your choice and breadcrumbs. Taste and season if necessary.
11. In a medium baking tray at least 10cm deep, layer the potatoes, the lentil sauce smoothed across the surface and then the bechamel sauce.
12. If you want sprinkle with some more breadcrumbs and cheese.
13. Bake in an 170 Celsius degree fan oven for 45 min or until golden.
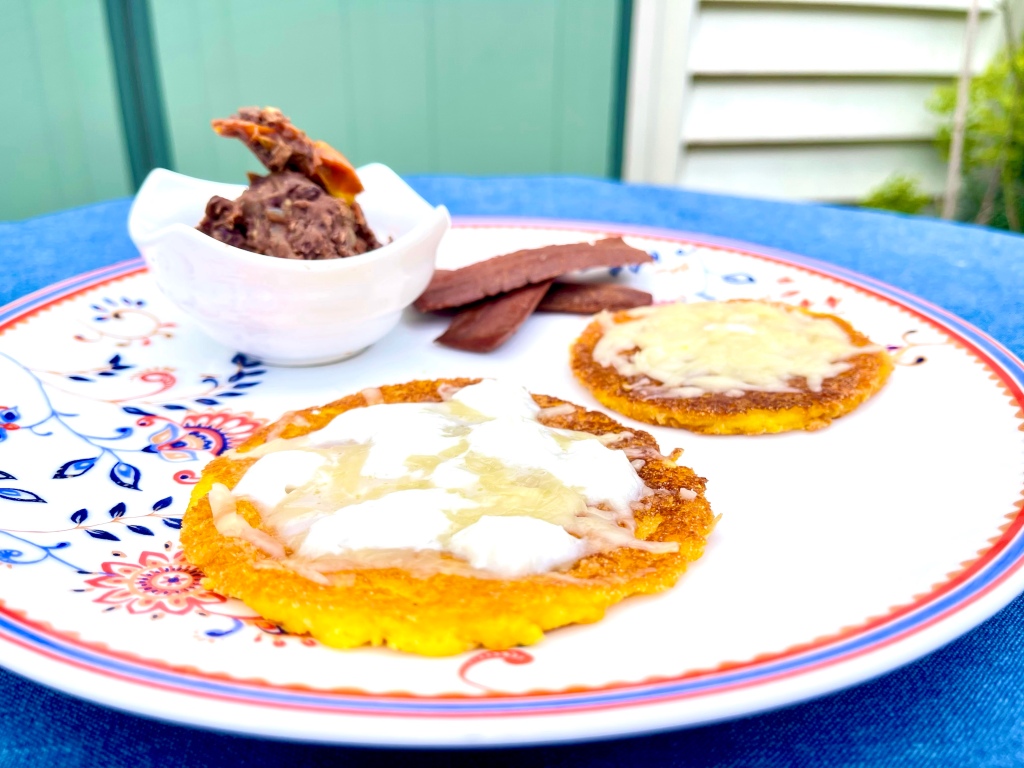
ANA MARIA & JUAN’S AREPAS DE CHOCLO
This is a very special recipe shared with us by Ana & Juan, two siblings born in Colombia and now living in different parts of the world. Sharing and making recipes, such as these sweetcorn arepas (arepas de choclo), from places we call home help us feel closer to each other when we are too far to hug. Thank you Ana Maria Millan and Juan for sharing a tasty treat and transporting us to your Mum’s Colombian Kitchen table, in that flat that was bought precisely because it could fit a table large enough to gather friends and family as its focal point of togetherness. Much love and respect to Ana’s wonderful Colombian Mama and all the Mamas many of us miss from afar! Thank you to Ana who shared this recipe and her words, which make up most of this post. Ana was born in Colombia and has been living in the UK for nearly 20 years.
Arepas are a traditional food of Latin America, and they come in many varieties. Some are made with different types of corn (e.g masa harina) or rice flour. They are eaten as part of a meal or as a meal itself. This recipe is made with young sweetcorn (choclo) and a mix of flours.
Ana says, ‘I like it because it is sweet, and also because it helps me bring together some of the components of my multi-cultural family: a Colombian recipe with Dutch cheese. My husband is Dutch so we try to make the most of both worlds. Although I only started making arepas after moving to the UK, this recipe takes me home, to my mum’s kitchen. The ideal way to have these is with Colombian hot chocolate, with cheese inside (but that’s another story).’
‘For us sharing food is very important. Growing up we always had dinner together – it was the time of the day when we would sit together and talk about our day and anything that was happening. And, that is something that I do with my family too – dinnertime is family time.’
What (feeds 2)
- 2 cups or 340g sweet corn kernels (use defrosted or tinned + drained)
- ½ cup or 110g flour – use either masa harina OR gluten free flour OR a mix of gluten free and fine cornmeal ground furtner in a stone pestle or mortar
- 1 teaspoon of softened butter or coconut oil
- 4 Tbsp. or around 60ml milk (dairy or vegetable)
- Pinch of sugar
How (30min)
- Place the sweetcorn in a food processor until it is mushy, but not smooth. Some kernels should be visible.
- Heat the milk and melt the butter of choice.
- Add the flours and sugar to the blender and blend till smooth.
- The batter should look like thick porridge but it should not be too stodgy. If it is too thick, dilute it with some more milk.
- Use a large non-stick pan to fit many small pancakes or a smaller to make 2-4 large ones.
- Heat a little bit of butter until melted. Pour the mixture in small or larger circle shapes. Flatten to about 1cm thickness (not too thin but a little bit more like an American or blueberry pancake).
- Cook on low heat until it is nice and golden for about 3-5 minutes.
- Flip over carefully so it doesn’t break. Put the sliced or grated cheese on top and cook for another 3-4 minutes. You can fold in half and flip over to melt cheese further.
- Serve and enjoy.
Lia’s Tips
- My perfect Ana & Juan arepas used a mix of gluten free flour and fine cornmeal (used for cornbread) ground down further in a stone pestle and mortar.
- Gluten free flour arepas were the second best.
- Heating up the milk to melt the butter worked really well.
- After my third attempt, I realised that the best way to blend the mix well was to add all the ingredients to the blender after first blending the corn kernels
- I used round metal moulds/cooking rings to make my round arepas. It helped my shape them and spread them thinner but they were mostly 2cm thick. I made mine about 10cm wide so the recipe quantity yielded between 8-10 small arepas.
- I LOVED using oat milk and coconut oil in my arepas. Ana is right it enhances the arepa sweetness
- I LOVED Ana’s Colombian/Dutch family tradition of using Edam cheese for the filling. It’s saltiness counterbalanced the arepa sweetness perfectly.
- Torn shreds of mozzarella was the second best cheese to use.
- I didn’t always fold the arepa as mine were mostly small.
- I loved serving with vegan or crisped up real bacon. Yum!
- Yes, I did the full Colombian thing and had chocolate with those. However, sweetened milky coffee was amazing too.
LUCY’S PAELLA
This is a recipe from our community and friends. Thanks to the the lovely Lucy Byrnes for the permission to share and adapt a recipe that makes her feel festive and takes her to a happy place she wants to share with us.
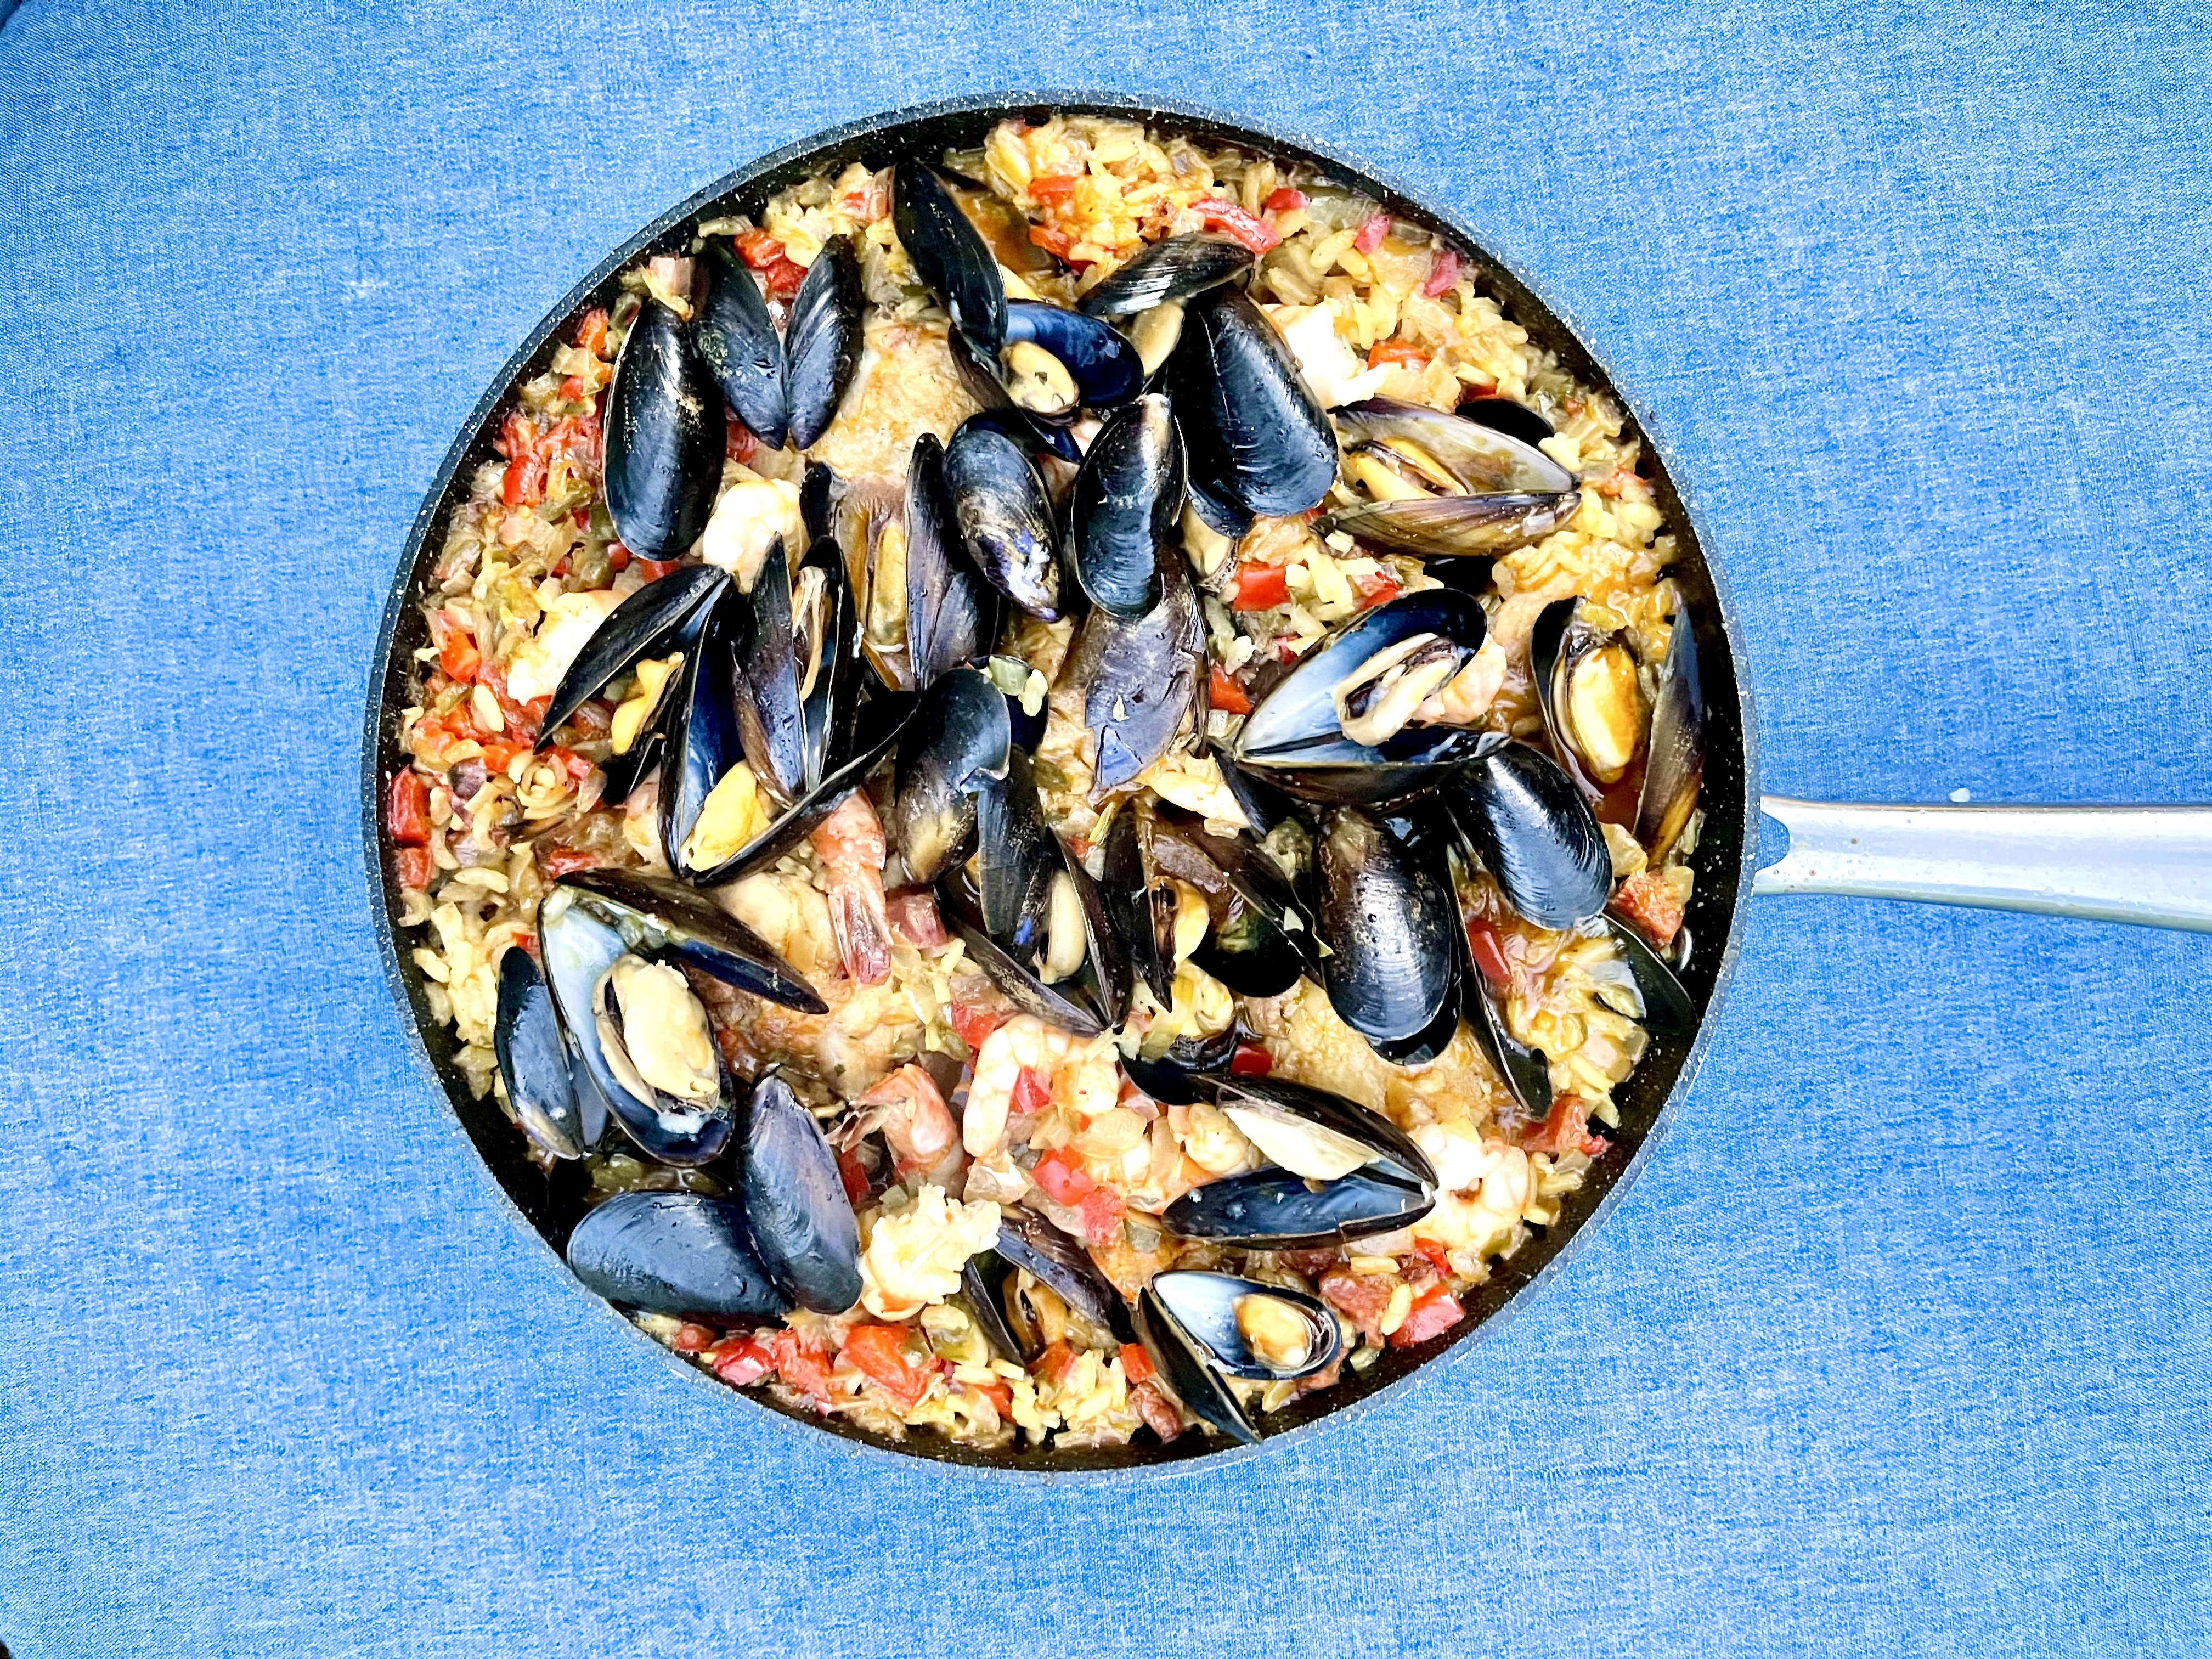
Lucy’s recipe feeds 4-6. It helped us see how easy is it to make paella at home to share with loved ones at all times and particularly during festivities.
What:
- 6 chicken drumsticks & wings (around 500g)
- 75g chorizo, sliced
- 2 peppers, Lucy recommends yellow & red for the colours
- 2 medium onions, finely chopped
- 3 cloves of garlic, crushed
- ½ -1 tsp smoked paprika
- 2-6 strands of saffron
- 2 pints or 1200 litre chicken or other stock (1 or 2 stock cubes depending on taste)
- 200g-250g paella rice
- 500-700g sea food you want (Lucy likes big prawns with the heads on and mussels. Use half and half)
- 2 Tbsp. olive oil
- Lemon to serve
- Salt for chicken
How:
- Get the mussels soaking for a few hours, scrub well to remove grit and pull the beards off.
- Season the chicken with generous amount of salt. Set aside whilst you prepare the veg.
- Prepare the hot stock, add the saffron, a couple of prawn heads and a mussel or two and set aside.
- Use a paella pan or shallow cast iron pan with a lid instead.
- Heat a couple of tablespoons of oil in the pan and lightly brown the chicken both sides turning occasionally for about 5 minutes.
- Add the sliced chorizo. Cook for a further minute.
- Take the chicken and chorizo out and set aside making sure the fat stays in the pan.
- Add the chopped onion to the pan (no need for extra oil) and fry until it starts to caramelise. Add the sliced peppers and cook for a couple more minutes.
- Stir in the crushed garlic, a small amount of saffron and the rice and stir it well.
- Return the chicken and chorizo to the pan.
- Add the stock first bit at a time, then the rest of it after a couple of minutes. Stir well and simmer for about 15 minutes.
- At this point the rice probably needs between 5 and 10 minutes so you need to add the mussels.
- Cover and after 3-4 minutes add the big prawns.
- Then turn the heat off and let it sit with the lid on for 10 minutes so that the rice can soak up all the juices.
- Squeeze some lemon juice when you serve and a nice cold glass of white wine and you are sorted as Lucy says.
Lia’s Kitchen Notes
- If you have no paella rice, you can use risotto or pudding rice. Just wash once to clear some starch.
- You can add the paprika to the chicken to marinade.
- Stir fry the rice until it starts getting translucent before adding the stock.
- Once you add the stock, stir once and then cook uncovered for 15-18 min.
- In honour of the Valencian paella I like my rice slightly caramelised at the bottom. Only add the mussels in when you are sure most of the water had evaporated.
- The Spanish do not usually use chorizo but we love it as the dish It reminds us of the Creole Jambalaya, which uses long grain rice and spicy southern sausages.
- We used a ten centimetre deep pan around 25cm wide. It just about fit 3 drumsticks, 2 chicken thighs, 500g mussels and 200g prawns.
- We used chicken on the bone and with the skin on. I like crispy skin and the flavour the bone adds.
#paella #spanishfood #food #recipes#worldflavours #globalkitchen #instafood #celebrate #easyrecipes #lucyspaella #liaskitchen
#paellarecipe #yourrecipe #recipesfromthecommunity
WILD GARLIC PESTO
This is the perfect weekend for wild garlic foraging and pesto making. Below is our recipe to complement our video recipe.
When picking wild garlic avoid decimating wild garlic patch areas. Instead leave the roots in, pick the larger leaves to make space for the shoots in their shadow, leave most of the buds (if picking some for pickles). Leave enough for others.
This recipe makes about 2 kilos of pesto, which you can gift & freeze for a flavour of spring in the depths of next winter.
What:
- 400g wild garlic leaves
- 6garlic cloves, minced
- 500g hazelnuts, roasted and peeled
- 300g Parmesan cheese
- 500 to 600ml extra virgin olive oil
- 6 to 8 tsp. sea salt
- 10 Tbsp. cider vinegar
- 1 to 2 tsp. sugar
How:
- Roast the hazelnuts in 200 degrees Celsius for 10-15 min. Cool and rub between your hands to peel skin off.
- Wash the wild garlic really well. We recommend 3 – 4 washes.
- Pat dry well with clean tea towels.
- In a large blender place at least half the wild garlic, garlic, salt, vinegar, sugar.
- Then weigh down with the nuts, Parmesan and olive oil.
- Blend to reduce in size. Then add what you couldn’t fit and blend again.
- If you have a very small blender, mix in batches. Place what you blend in the same bowl and mix well at the end to ensure consistency of seasoning and flavour.
- If placing in the freezer use small pot and avoid glass jars.
We filmed this whilst listening to Laura Marling’s interview in @bbc6music. Have a listen.
#maker #make #forage #foragedfood #food #wildgarlic #wildgarlicpesto #film #recipes #seasonal #cooktheseason #preseve #gooutside #worldflavours #globalkitchen #pesto #localingredients #instafood #lowimpact #eatwell #easyrecipes #liaskitchenrecipes #wildgarlicpestorecipe #wildgarlicrecipes #recipes #videorecipes #liaskitchen
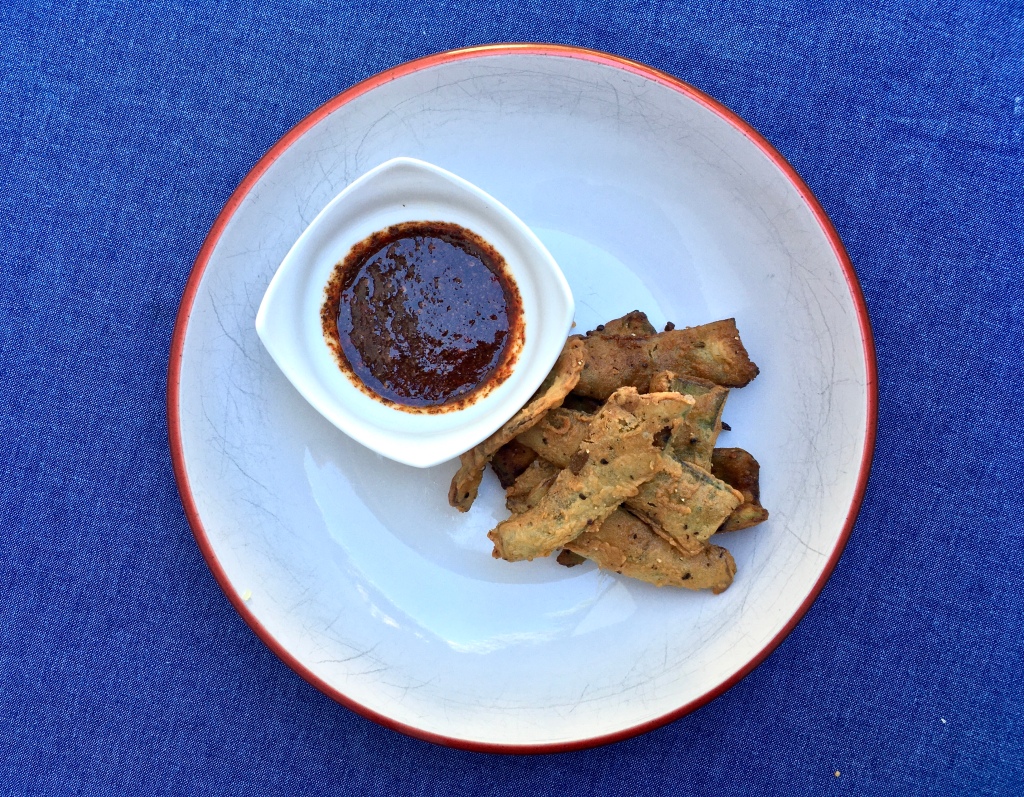
Broadbean CropShare #3: Broadbean pod fries with Korean Gochugang dipping sauce
When you read our guest Broadbean Crop Share blog on Global Gardens Website News Section on 10/06/2020 you can read more about our approach to food and culinary exploration. In the past year Lia’s Kitchen has collected over fifty cook books (second hand and donations) for a shared cookbook library. When exploring what we could do with the fresh broad bean crop given to us by Global Gardens Project we turned for inspiration to these books. It was in Genevieve Taylor’s Charred that we learned how to make a dipping sauce with Korean red pepper flakes. We had to adjust the recipe to our ingredients but we want to fully credit this book for the idea and inspiration. Our Broadbean pod fries inspired by Chef Tom Hunt are gorgeous with that sauce. The only problem is you can actually eat too much and be unable to move. Our crop share recipes have taken a Wasteless approach using the whole plan from leaves, pods and beans. Enjoy!
Ingredients
- Discarded pods of 300g fresh broadbeans (used in our crisped mint broad bean crostini or creamed broadbean crostini recipes)
- 6 Tbsp. self-raising flour (GF flour works well too)
- A couple of generous pinches of salt
- 200ml milk
- Vegetable oil for deep frying
Genevieve’s Korean pepper flakes dipping sauce variation
- 3 Tbsp. soya sauce
- 1 Tbsp. Korean chilli red pepper flakes
- 1 Tbsp. sesame oil
- 2 tsp. white wine vinegar
- 1 tsp. mirin sauce
- 1 crushed garlic clove
- 1 tsp. caster sugar
- 1 Tbsp. sesame seed toasted and then ground
Method:
- Toast the sesame seeds in a non-stick pan and set aside to cool down.
- Mix all the sauce ingredients in a bowl. When the seeds are cooled grind finely in a pestle and mortar and add to the sauce. Let it sit whilst making the Broadbean pod fries.
- Place three fingers of vegetable oil in a deep pot and turn the heat up placing a lid on.
- Make sure you string the pods well when you are shelling the beans. Use a sharp knife to double string the sides of the split pod again before frying preparation.
- Cut each pod shell in 5cm long pieces.
- Mix the flour and salt well in a bowl.
- Place the milk in another bowl.
- Dust the pod shells in flour lightly on both sides. Shake flour off well.
- Swiftly dunk the floured pods in the milk and return to the flour.
- Dust in flour for the second time.
- By this time the oil should be ready for deep frying.
- Place the pods in the pot but do not cram.
- Reduce the heat and deep dry for around 4 minutes or until golden but not burnt.
- Remove with a slotted spoon
- Drizzle with the sauce or dip each fry in the sauce with every bite you take!
Broadbean CropShare #2: Creamed broad beans with yoghurt and roasted hazelnuts on crostini
This is the second recipe we are contributing to the #Stayhomeeatveg crop share by Global Gardens project. You can read Lia’s blog on Global Gardens Website News Section from 10/06/2020 where she talks about what this crop means to her and shares tips and ideas on cooking with fresh broad beans.
Creamed broad beans with yoghurt and roasted hazelnuts on crostini
You will need three crostini slices for this recipe too. For the Crostini all you need is finely sliced bread (up to 2cm) brushed with olive oil and toasted on a really hot non stick pan. Now for the topping.
What (three portions):
- 100g shelled and double podded green broad beans
- 10g butter (nearly a Tbsp)
- Pinch of salt
- 70 to 100g Greek or other yoghurt
- Savory herb leaves (optional)
How:
- Take a handful of whole hazelnuts, place in a baking tray and bake for 10 minutes on a hot oven (200 degrees Celsius). Remove to a plate and cool down.
- You will need around 300g broad beans in pods to yield 100g double podded beans.
- Remove the bean seeds from the pod. Keep the pods aside to make delicious fritters on the same day.
- Blanche the beans in boiling water for at least 3 minutes. Cool and remove the shell. Here is how to do it.
- Melt the butter in a non-stick pan, toss the split beans in with a pinch of salt and stir fry for a couple of minutes.
- Mash with a hand masher in the pan on really low heat.
- Take of the heat and whilst still warm, add the yoghurt (and savory if using) and mash to a creamy consistency.
- Peel the skin off the hazelnuts by rubbing between your hands. Roughly chop or grind.
- Place a thick layer of Fava/creamed broad beans on each crostini. Top with the hazelnuts and some freshly ground pepper if you prefer.
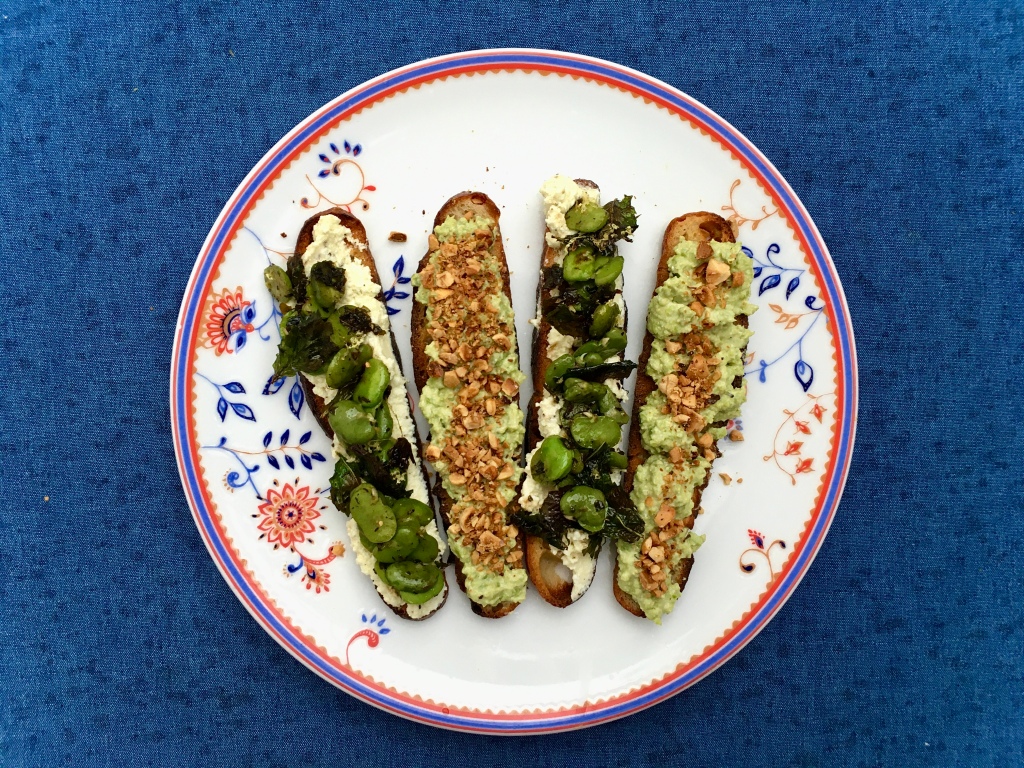
Broadbean CropShare #1: Crisped mint broad bean crostini with Feta mash
This week we are participating in a crop share project by Global Gardens in Cardiff. One of our director’s Lia has been given a crop of broad beans, pods/beans and leaves to cook with! She is publishing a blog about what this crop share meant to her and what to do with beans on the Global Gardens Website News Section. Here is the first recipe she made for this project.
Crisp mint broad beans with Feta mash on Crostini (for three slices)
We have been baking a lot of sourdough bread at home. When it goes stale we love slicing what is left very thinly and making crispy crostini to add seasonal toppings. For the Crostini all you need is finely sliced bread (up to 2cm) brushed with olive oil and toasted on a really hot non stick pan. Now for the topping.
Ingredients (three portions)
- 100g shelled and double podded green broad beans
- 6gr fresh mint leaves (any kind)
- 15g butter (roughly a Tbsp.)
- Pinch of salt
- 100gr Feta cheese
- 30ml Extra virgin olive oil
- ½ tsp. freshly ground pepper
Method
- For the Feta mash: mash the feta, olive oil and pepper in a bowl until creamy. Set aside.
- You will need around 300g broad beans in pods to yield 100g double podded beans.
- Remove the bean seeds from the pod. Keep the pods aside to make delicious fritters on the same day.
- Blanche the beans in boiling water for at least 3 minutes. Cool and remove the shell. Here is how to do it.
- Melt the butter in a non-stick pan .
- Before it browns add the whole (washed) mint leaves and crisp up on medium heat for a minute or two.
- Before the leaves brown add the shelled and separated beans, a pinch of salt and stir well.
- On each crostini spread a medium thick layer of the Feta mash and top with some beans.

LOVE EWE
Posted on Updated on
We have joined forces with Ty Caws cheesemongers in Wales to tell you why we think you should give ewe’s or sheep’s milk cheese a go. Contact our friend Owen and place your order for that cheese now! Or attend some of the forthcoming Farmer’s markets in Wales where Owen and the team showcase cheese we love to eat.
To help you take that step to loving ewe, we are sharing an easy, baked cheese recipe for the fantastic & award winning #fettle cheese from Shepherd’s Purse in Yorkshire. You can order #fettle from Ty Caws or get it at forthcoming farmers market in Cardiff. We also recommend Brefu raw ewe’s milk cheese from Cosyn Cymru (uses thistle rennet so it is truly vegetarian).
Here is why we think you should eat Ewe’s milk cheese:
1. It’s so tasty! If you are not so hot on goat cheese (which we also love by the way) why not try some sheep or ewe milk cheese instead? You might actually like it.
2. It is digestible! A great alternative to cow’s milk cheese and an overall much more digestible dairy product for most humans!
3. You support UK sheep farmers who really need our help to survive during these hard times. Shepherd’s Purse Cheese company recently increased its investment in a sheep farmer collective it supports to ensure the production of fettle and other sheep’s milk cheeses. Every slice you buy it from Ty Caws in Wales this helps some sheep farmer continue having the demand to sustain a dairy producing herd. How great is that?
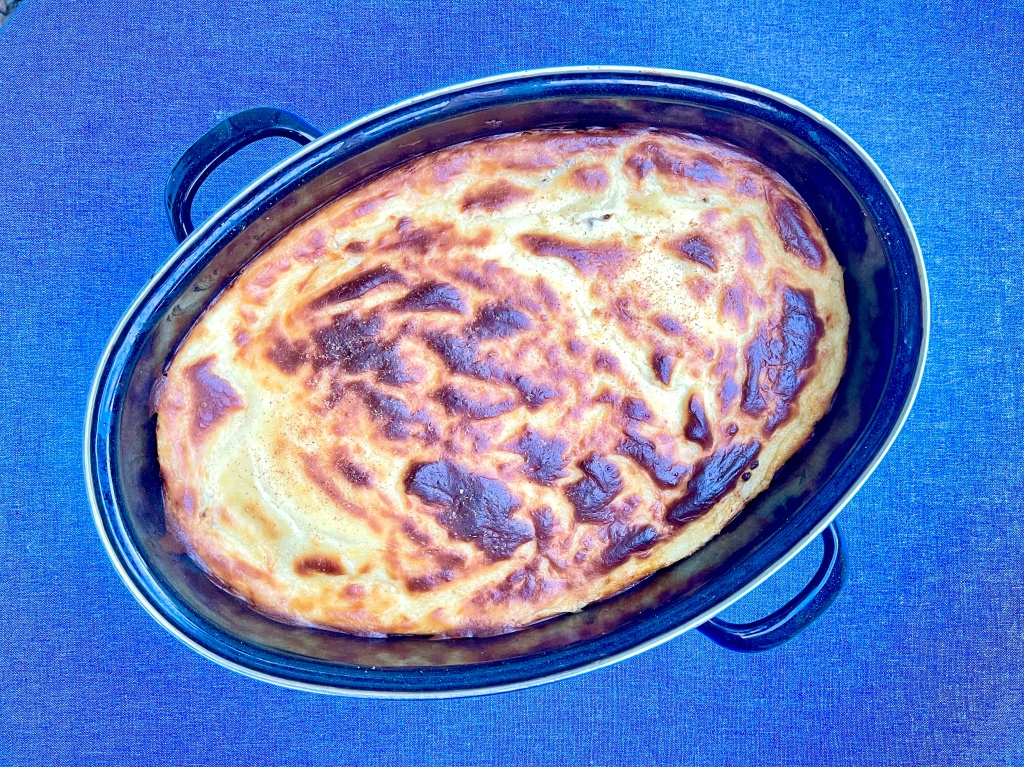
Bougiourntí Baked Fettle Recipe
What:
How
Whilst Fettle uses a feta cheese making method it is not feta but it is utterly delicious. It seems less ‘pickled’ than Greek feta cheese and is therefore less tangy! But as the sheep herds graze on grassier plains the cheese is creamier, nuttier and denser in texture (as well as salty enough to make it distinct). When baked its texture changes beautifully to be a little bit more chewy (like halloumi on a grill). We also loved it in fresh tomato salads with salted onions and generous amount of extra virgin olive oil.
Lia’s Kitchen is a community interest company which aims to raise awareness on independent, sustainable and local food producers and suppliers as part of its objectives. We seek out local knowledge to raise awareness of such produce. We also aim to raise awareness on food which is accessible to people with health conditions and dietary restrictions – ewe’s milk cheese makes dairy products accessible to those with cow milk intolerance or allergies. Whilst were given free samples of the ewe’s milk cheese we were not obliged to write about it or to recommend its consumption Please make sure you do not consumer dairy products if you are allergic to all dairy! . We were not paid for this feature.
Share this:
This entry was posted in Comment, Greek cuisine, Recipes, Review and tagged baked cheese, bougiournti, chephardspurse, cosyncymru, cowmilkallergyalternatives, easyrecipes, ewesmilk, ewesmilkcheese, indepemdentproducers, independentbusiness, liaskitchen, recipes, sheepsmilk, sheepsmilkcheese, supportfarming, tycasw, Wales, yorkshire.