vegetarian
USE-WHAT-YOU-HAVE MOUSSAKÁ
As a person who grew up in Greece I get asked for Moussaka recipes all the time. Moussaká is really as diverse as each household. Go to http://www.instagram.com/lias_kitchen to read what differentiates Moussaká from other bakes!

In this post we want to demystify one of the most popular dishes of modern Greek cooking. My usual béchamel sauce is one where milk is flavoured with mace or nutmeg in advance and then slowly heated whilst you slowly add flour, butter and one egg. Not really a roux method but something we call Kourkoúti. But to make things simple for you we recommend you make a béchamel (or morney) sauce you know how to make and have provided a link to a BBC recipe.
In the past year I have made Moussaka with what I have. I always have uncooked lentils in my store cupboard and love using them for a vegetarian, use-what-you-have version of the dish. Use 300 to 500g of minced beef if that’s what you prefer. The authentic Moussaka in my mum’s kitchen uses two layers of aubergine but potato is just fine particularly when your vegetable box has too many potatoes you need to use up.
Enjoy our delicious recipe below!
What:
⁃ 3/4 to 1 cup or mug uncooked lentils (brown or green or black)
⁃ 1 onion, chopped
⁃ 3 allspice berries, crushed (optional)
⁃ 1/2 cup white wine
⁃ 3 to 4 garlic cloves, finely shopped
⁃ 1 tin chopped tomatoes
⁃ 500ml hot water (2cups)
⁃ 30g chopped parsley
⁃ Bay leaf (optional)
⁃ 1 egg beaten
⁃ 1/2 cup breadcrumbs
⁃ 250g crumbled or greater goat or ewe’s cheese such as feta, Abergavenny goat, manchego, pecorino or graviera.
⁃ Salt
⁃ 1 béchamel portion of your choice
⁃ Mace + bay leaf or just grated nutmeg to flavour
⁃ Half kg potatoes or as many it takes to fill a medium baking tray, sliced in circles of 1.5 to 2cm thickness
⁃ Mix of vegetable and olive oil to shallow fry
What:
1. Soak the lentils for an hour or two (optional).
2. Start with making the lentil filling.
3. Fry the onion in 2tbsp. Olive oil with a pinch of salt for 5min.
4. Add the drained lentils, a pinch of pepper and the crashed allspice berries and fry for a couple of minutes.
5. Add the wine, stir and follow with the tinned tomatoes & hot water.
6. Add another couple of pinches of salt, the bay leaf (if using) and the chopped parsley.
7. Cover and simmer for 30.
8. Whilst the sauce is simmering make a béchamel portion of your choice and fry the potatoes till mostly cooked.
9. Use 2-3 Tbsp. Vegetable oil and 2 Tbsp. Olive oil to fry the potatoes.
10. Make sure to cool down the lentil sauce before adding the beaten egg, cheese or mix of cheeses your choice and breadcrumbs. Taste and season if necessary.
11. In a medium baking tray at least 10cm deep, layer the potatoes, the lentil sauce smoothed across the surface and then the bechamel sauce.
12. If you want sprinkle with some more breadcrumbs and cheese.
13. Bake in an 170 Celsius degree fan oven for 45 min or until golden.
ANA MARIA & JUAN’S AREPAS DE CHOCLO
This is a very special recipe shared with us by Ana & Juan, two siblings born in Colombia and now living in different parts of the world. Sharing and making recipes, such as these sweetcorn arepas (arepas de choclo), from places we call home help us feel closer to each other when we are too far to hug. Thank you Ana Maria Millan and Juan for sharing a tasty treat and transporting us to your Mum’s Colombian Kitchen table, in that flat that was bought precisely because it could fit a table large enough to gather friends and family as its focal point of togetherness. Much love and respect to Ana’s wonderful Colombian Mama and all the Mamas many of us miss from afar! Thank you to Ana who shared this recipe and her words, which make up most of this post. Ana was born in Colombia and has been living in the UK for nearly 20 years.
Arepas are a traditional food of Latin America, and they come in many varieties. Some are made with different types of corn (e.g masa harina) or rice flour. They are eaten as part of a meal or as a meal itself. This recipe is made with young sweetcorn (choclo) and a mix of flours.
Ana says, ‘I like it because it is sweet, and also because it helps me bring together some of the components of my multi-cultural family: a Colombian recipe with Dutch cheese. My husband is Dutch so we try to make the most of both worlds. Although I only started making arepas after moving to the UK, this recipe takes me home, to my mum’s kitchen. The ideal way to have these is with Colombian hot chocolate, with cheese inside (but that’s another story).’
‘For us sharing food is very important. Growing up we always had dinner together – it was the time of the day when we would sit together and talk about our day and anything that was happening. And, that is something that I do with my family too – dinnertime is family time.’

What (feeds 2)
- 2 cups or 340g sweet corn kernels (use defrosted or tinned + drained)
- ½ cup or 110g flour – use either masa harina OR gluten free flour OR a mix of gluten free and fine cornmeal ground furtner in a stone pestle or mortar
- 1 teaspoon of softened butter or coconut oil
- 4 Tbsp. or around 60ml milk (dairy or vegetable)
- Pinch of sugar
How (30min)
- Place the sweetcorn in a food processor until it is mushy, but not smooth. Some kernels should be visible.
- Heat the milk and melt the butter of choice.
- Add the flours and sugar to the blender and blend till smooth.
- The batter should look like thick porridge but it should not be too stodgy. If it is too thick, dilute it with some more milk.
- Use a large non-stick pan to fit many small pancakes or a smaller to make 2-4 large ones.
- Heat a little bit of butter until melted. Pour the mixture in small or larger circle shapes. Flatten to about 1cm thickness (not too thin but a little bit more like an American or blueberry pancake).
- Cook on low heat until it is nice and golden for about 3-5 minutes.
- Flip over carefully so it doesn’t break. Put the sliced or grated cheese on top and cook for another 3-4 minutes. You can fold in half and flip over to melt cheese further.
- Serve and enjoy.
Lia’s Tips
- My perfect Ana & Juan arepas used a mix of gluten free flour and fine cornmeal (used for cornbread) ground down further in a stone pestle and mortar.
- Gluten free flour arepas were the second best.
- Heating up the milk to melt the butter worked really well.
- After my third attempt, I realised that the best way to blend the mix well was to add all the ingredients to the blender after first blending the corn kernels
- I used round metal moulds/cooking rings to make my round arepas. It helped my shape them and spread them thinner but they were mostly 2cm thick. I made mine about 10cm wide so the recipe quantity yielded between 8-10 small arepas.
- I LOVED using oat milk and coconut oil in my arepas. Ana is right it enhances the arepa sweetness
- I LOVED Ana’s Colombian/Dutch family tradition of using Edam cheese for the filling. It’s saltiness counterbalanced the arepa sweetness perfectly.
- Torn shreds of mozzarella was the second best cheese to use.
- I didn’t always fold the arepa as mine were mostly small.
- I loved serving with vegan or crisped up real bacon. Yum!
- Yes, I did the full Colombian thing and had chocolate with those. However, sweetened milky coffee was amazing too.
Arakas – peas the Greek Way
Arakás is a dish ideal for a quick and easy complete vegan meal any day of the week, throughout the year. It is a garden pea, carrot and potato stew with simple, clean flavours and beautiful textures, characterised by the fruity flavour of olive oil and the aromas dill and parsley.

Arakás belongs to Laderá, a category of dishes which is a staple in the weekly Greek diet and which literally translates to ‘with oil’ or ‘oily’. Rather than cooking vegetables as a side, the vegetable of choice is the main event, with a similar process of preparation for each Ladero dish but different vegetable and herbs starring in each recipe depending on the seasonality and accessibility of vegetables, e.g. Okra, aubergine, green beans, etc.
Modern Greeks still eat copious amounts of Laderá despite their increasing gyros and souvlaki eating habits – they are healthy, affordable and delicious staples of a balanced diet. And for convenience it is ingenious to have dishes which provide you with a whole meal in a pot making vegan and vegetarian food easily accessible throughout the year. With frozen peas available this dish can help you make the most of small quantities of carrot and potato you have left over. Just bag yourself some dried dill and parsley to use in this recipe in the future so that you don’t have to find fresh herbs each time.
Ingredients
- 500g frozen garden peas
- 2 carrots, sliced in thick rings or cubed
- 1 large potato, peeled and cubed (walnut size cubes)
- 1 onion, chopped
- 200g chopped tomatoes or passata (or 1 large fresh tomato grated or 1 Tbsp. tomato paste)
- ½-1 small bunch of dill (up to 20g)
- A few sprigs finely chopped parsley
- 2 tsp sea salt
Preparation
- Coat the bottom of a medium sized pot with the olive oil.
- When hot add the chopped onion with a teaspoon of salt and sauté on low heat until translucent.
- Add the potatoes, carrots and pepper. Stir well to coat the oil.
- Add the frozen peas and stir well until they are also well coated with oil.
- Add the tomato of your choice stirring well for a couple minutes to start the cooking process and release the tomato flavour.
- Finally add the herbs and up to 1.5 cups boiling water with another teaspoon of salt.
- The water should cover the ingredients but should not be too much as you are aiming for a dry stew rather than a soup or saucy dish.
- Stir well and when the contents come to the boil simmer the stew for 30 to 45 minutes.
- The food is ready when liquid is absorbed. There should be enough liquid to sponge up with nice slice bread but not so much as the vegetable swim in it.
- Cool down the dish for 10-15 minutes before serving. This dish is delicious in room temperature or reheated up to two days from cooking. It also freezes well.
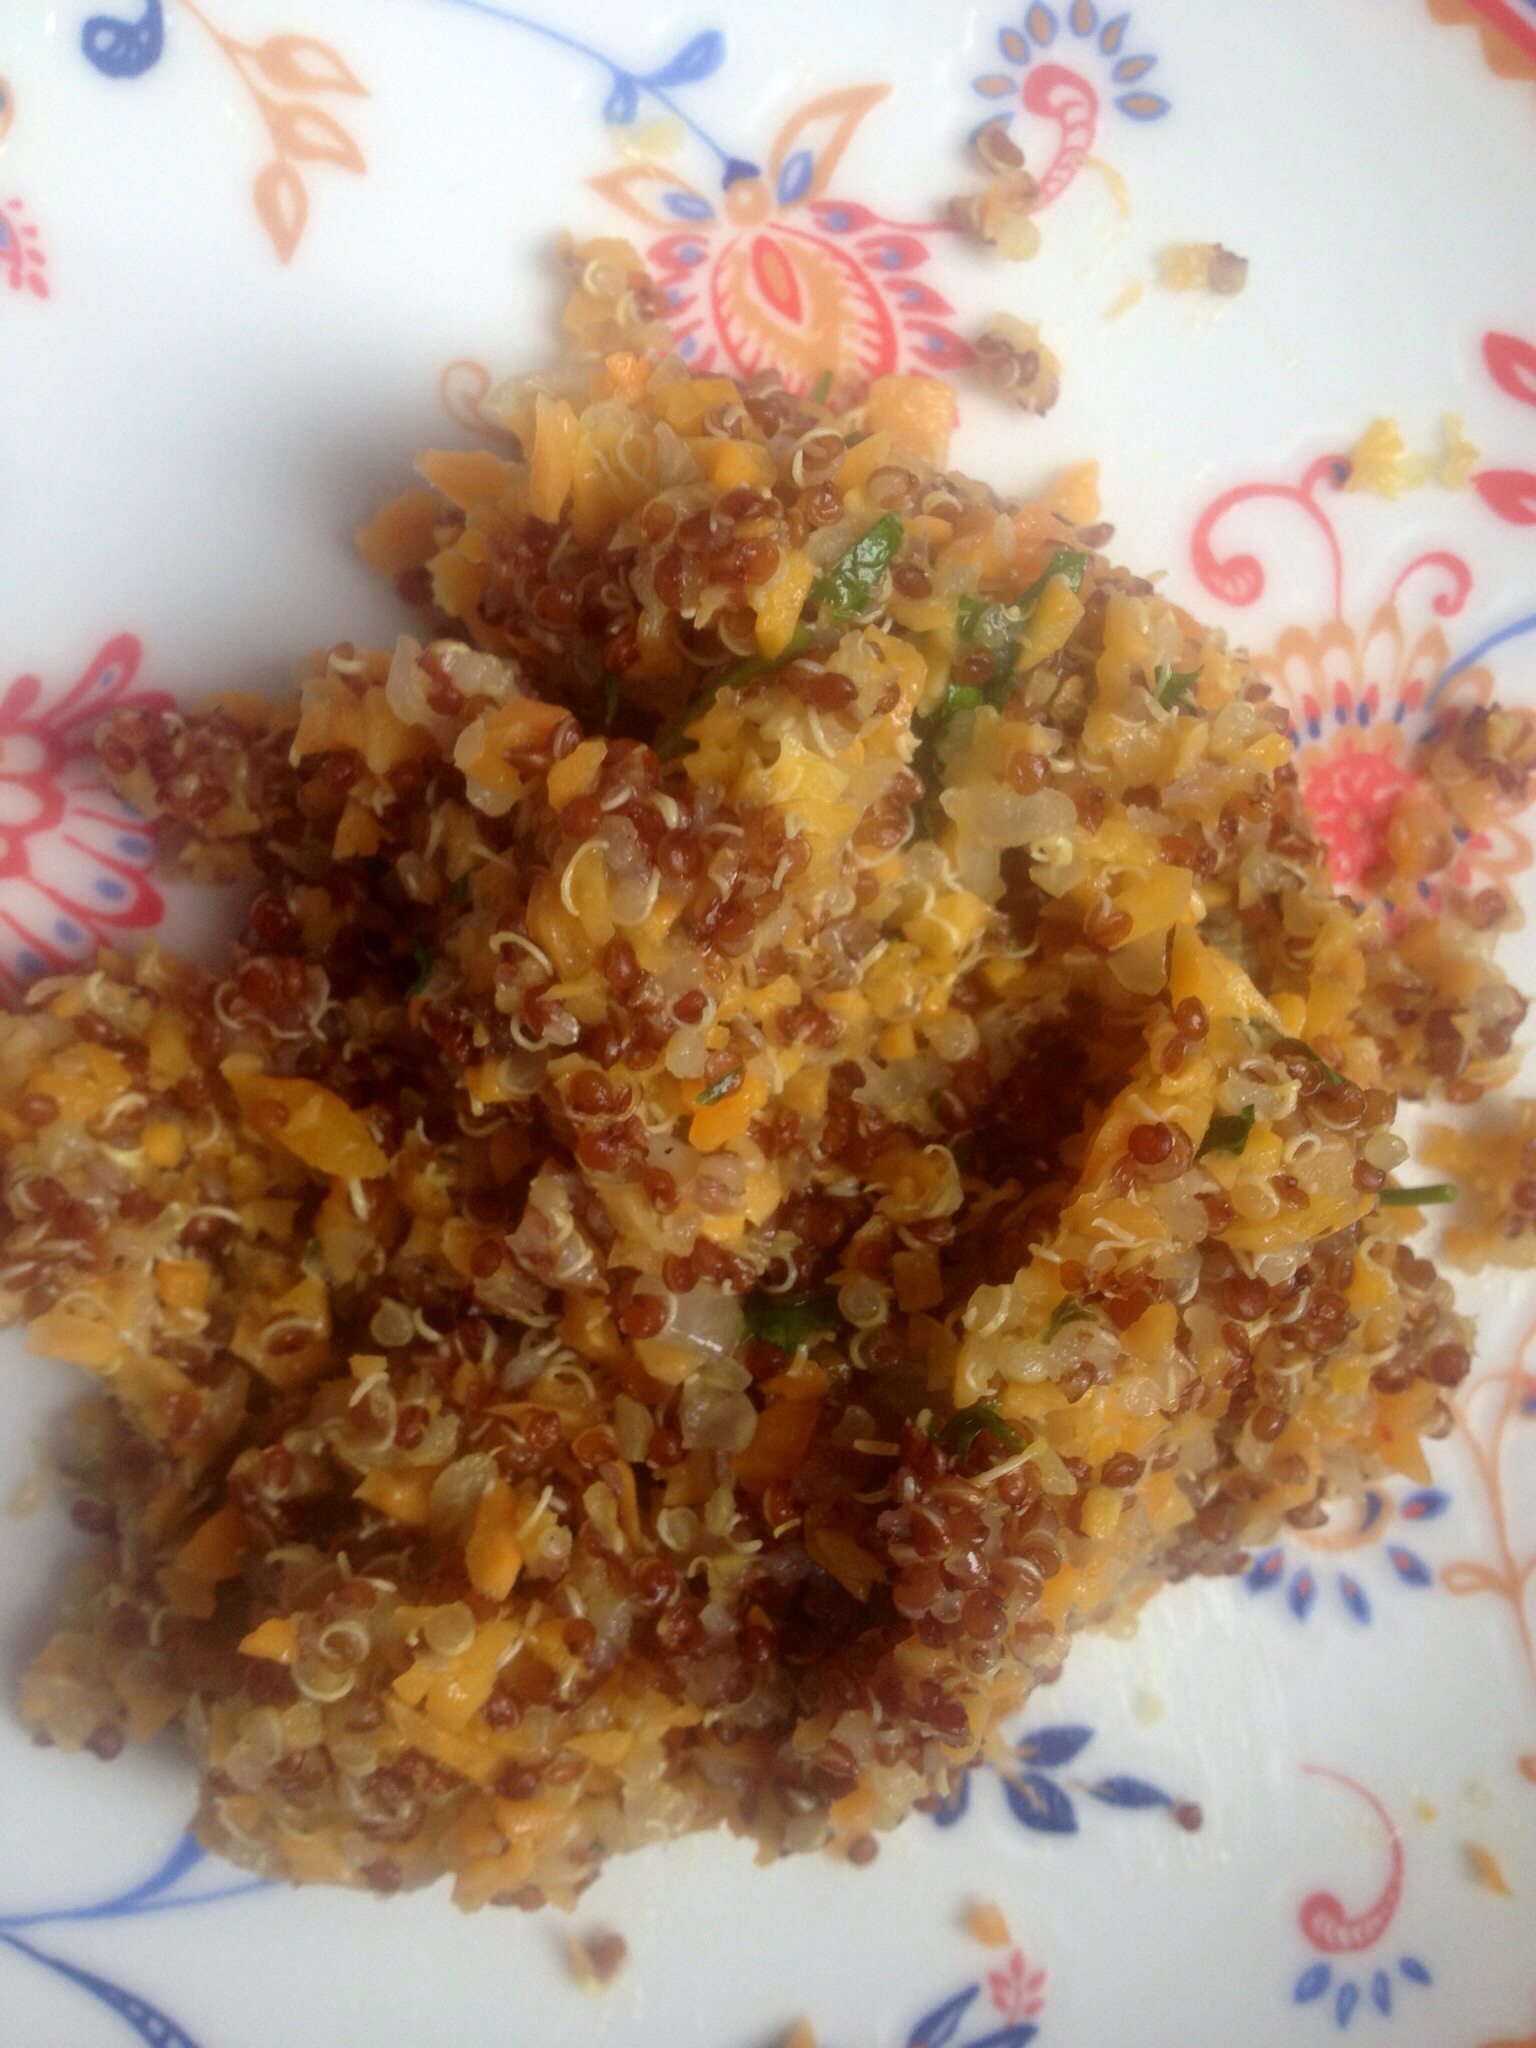
Red quinoa with sweet potato
Quinoa with sweet potato is becoming a real favourite at Lia’s Kitchen both when we are receiving guests but also when we are touring. This is an easy to make but very nutritious dish. It was on our September supperclub menu and last night this was a side dish at our dinner table when our Braunton family visited.
I am writing down this recipe for Miss Lyra May, or more accurately for her mom Beth, because she promised me that if her mommy cooks this recipe for her she will keep eating quinoa.
Now I know that this nearly four year old lady is a smart negotiator but , my dear Beth, I still think it is worth giving this a go. After all Miss Lyra’s one year old brother never objected at all to eating the quinoa.
Ingredients
Yield 6-8
1 cup red , mixed or plain quinoa
2 cups vegetable stock
1 large sweet potato coarsely grated
1 large onion finely chopped
1 (fresh) bay leaf
1/2 t mixed spices of cinnamon, cloves, pepper or a small pinch of each (optional)
1 garlic clove mashed (optional)
150 gr mince quorn (optional)
a couple of squeezes lime or lemon (optional)
1 small bunch parsley finely chopped
salt
Preparation
30 minutes
Boil two cups water and make vegetable stock.
Simmer the quinoa for up to twenty minutes, until cooked but not sticky.
Add enough olive oil to cover the base of a frying pan.
Add the onion and the bay leaf and sauté for a couple of minutes.
Add a pinch of salt.
Add the sweet potato and stir fry until soft -5 to 10 minutes.
Add the quinoa , parsley and if you need to some more olive oil.
Taste and season is necessary.
If you are using citrus juice add last.
Stir well and enjoy.
Tourlou!
Spring is here! I am writing to you from one of our local cafés. Its wide French doors are open to an outdoor terrace. It’s still light and warm and a soft breeze just brought in scents of blossom (and something delicious cooking in a kitchen).
I have chosen to share with you the recipe for Tourlou, a mixed vegetable dish that tastes like spring and summer to me. A fridge chilled portion of it with some crumbled feta (surprise, surprise!) is just as nice to eat as straight after cooking or cooled to room temperature. But I’d prefer the chilled version today because it makes me think of Vourvourou, my friend Maria and resting in the shade in her company sipping a chilled beer (sigh!).
Back to cooking! Tourlou is an easy recipe and great for using a medley of vegetable. It can be a light evening dinner on its own or served with rice, a delicious side dish or alternative to salad, and a fantastic tapa or meze. And apparently Tourlou is the same as briam only it’s cooked on a hob- here’s something new for food geeks like me.
Ingredients
Serves 2 for main and more as a meze or side
1 aubergine
2 courgette
2-3 potatoes
1 large onion, chopped
2 garlic cloves, finely chopped or crushed
1 pepper, chopped (optional)
1 carrot (optional)
200g ripe tomatoes, finely chopped or chopped in blender
OR
1 can chopped tomatoes (400g mixed weight)
Small bunch of parsley, finely chopped
1 tsp salt
½ tsp sugar
Pepper (to taste)
Olive oil
Preparation
Takes up to an hour
Wash all vegetable, peel the potatoes, and dice it all in five centimeter (large) chunks.
Sauté the onion and a pinch of salt in about two Tbsp olive oil for a couple of minutes.
Add one or two more Tbsp olive oil, the vegetable, toss and fry for about five minutes.
Add the garlic, let it fry for a minute without burning and add the tomatoes.
Add the sugar and also season with salt and pepper.
Stir well and cover.
Lower the heat and simmer for forty minutes or until the potatoes are soft.
Add the chopped parsley at the end or half way through the cooking.
Lia’s Notes:
- For a good Tourlou do not to stir during simmering to avoid breaking the vegetable as it softens.
- The tomatoes should have enough juice for all the vegetable to cook but halfway through cooking check if you need to add a couple of Tbsp of water to make sure the potatoes cook.
- Replace potatoes with other root vegetable such as parsnip if you like.
- I prefer cooking Tourlou with more aubergine and one courgette.
- Use any vegetable you like. Okra is fantastic in tourlou but might take a bit longer to cook.
- For Briam use the same ingredients, add a little bit of water and cover a baking tray with foil. Slow cook for about an hour in the oven.

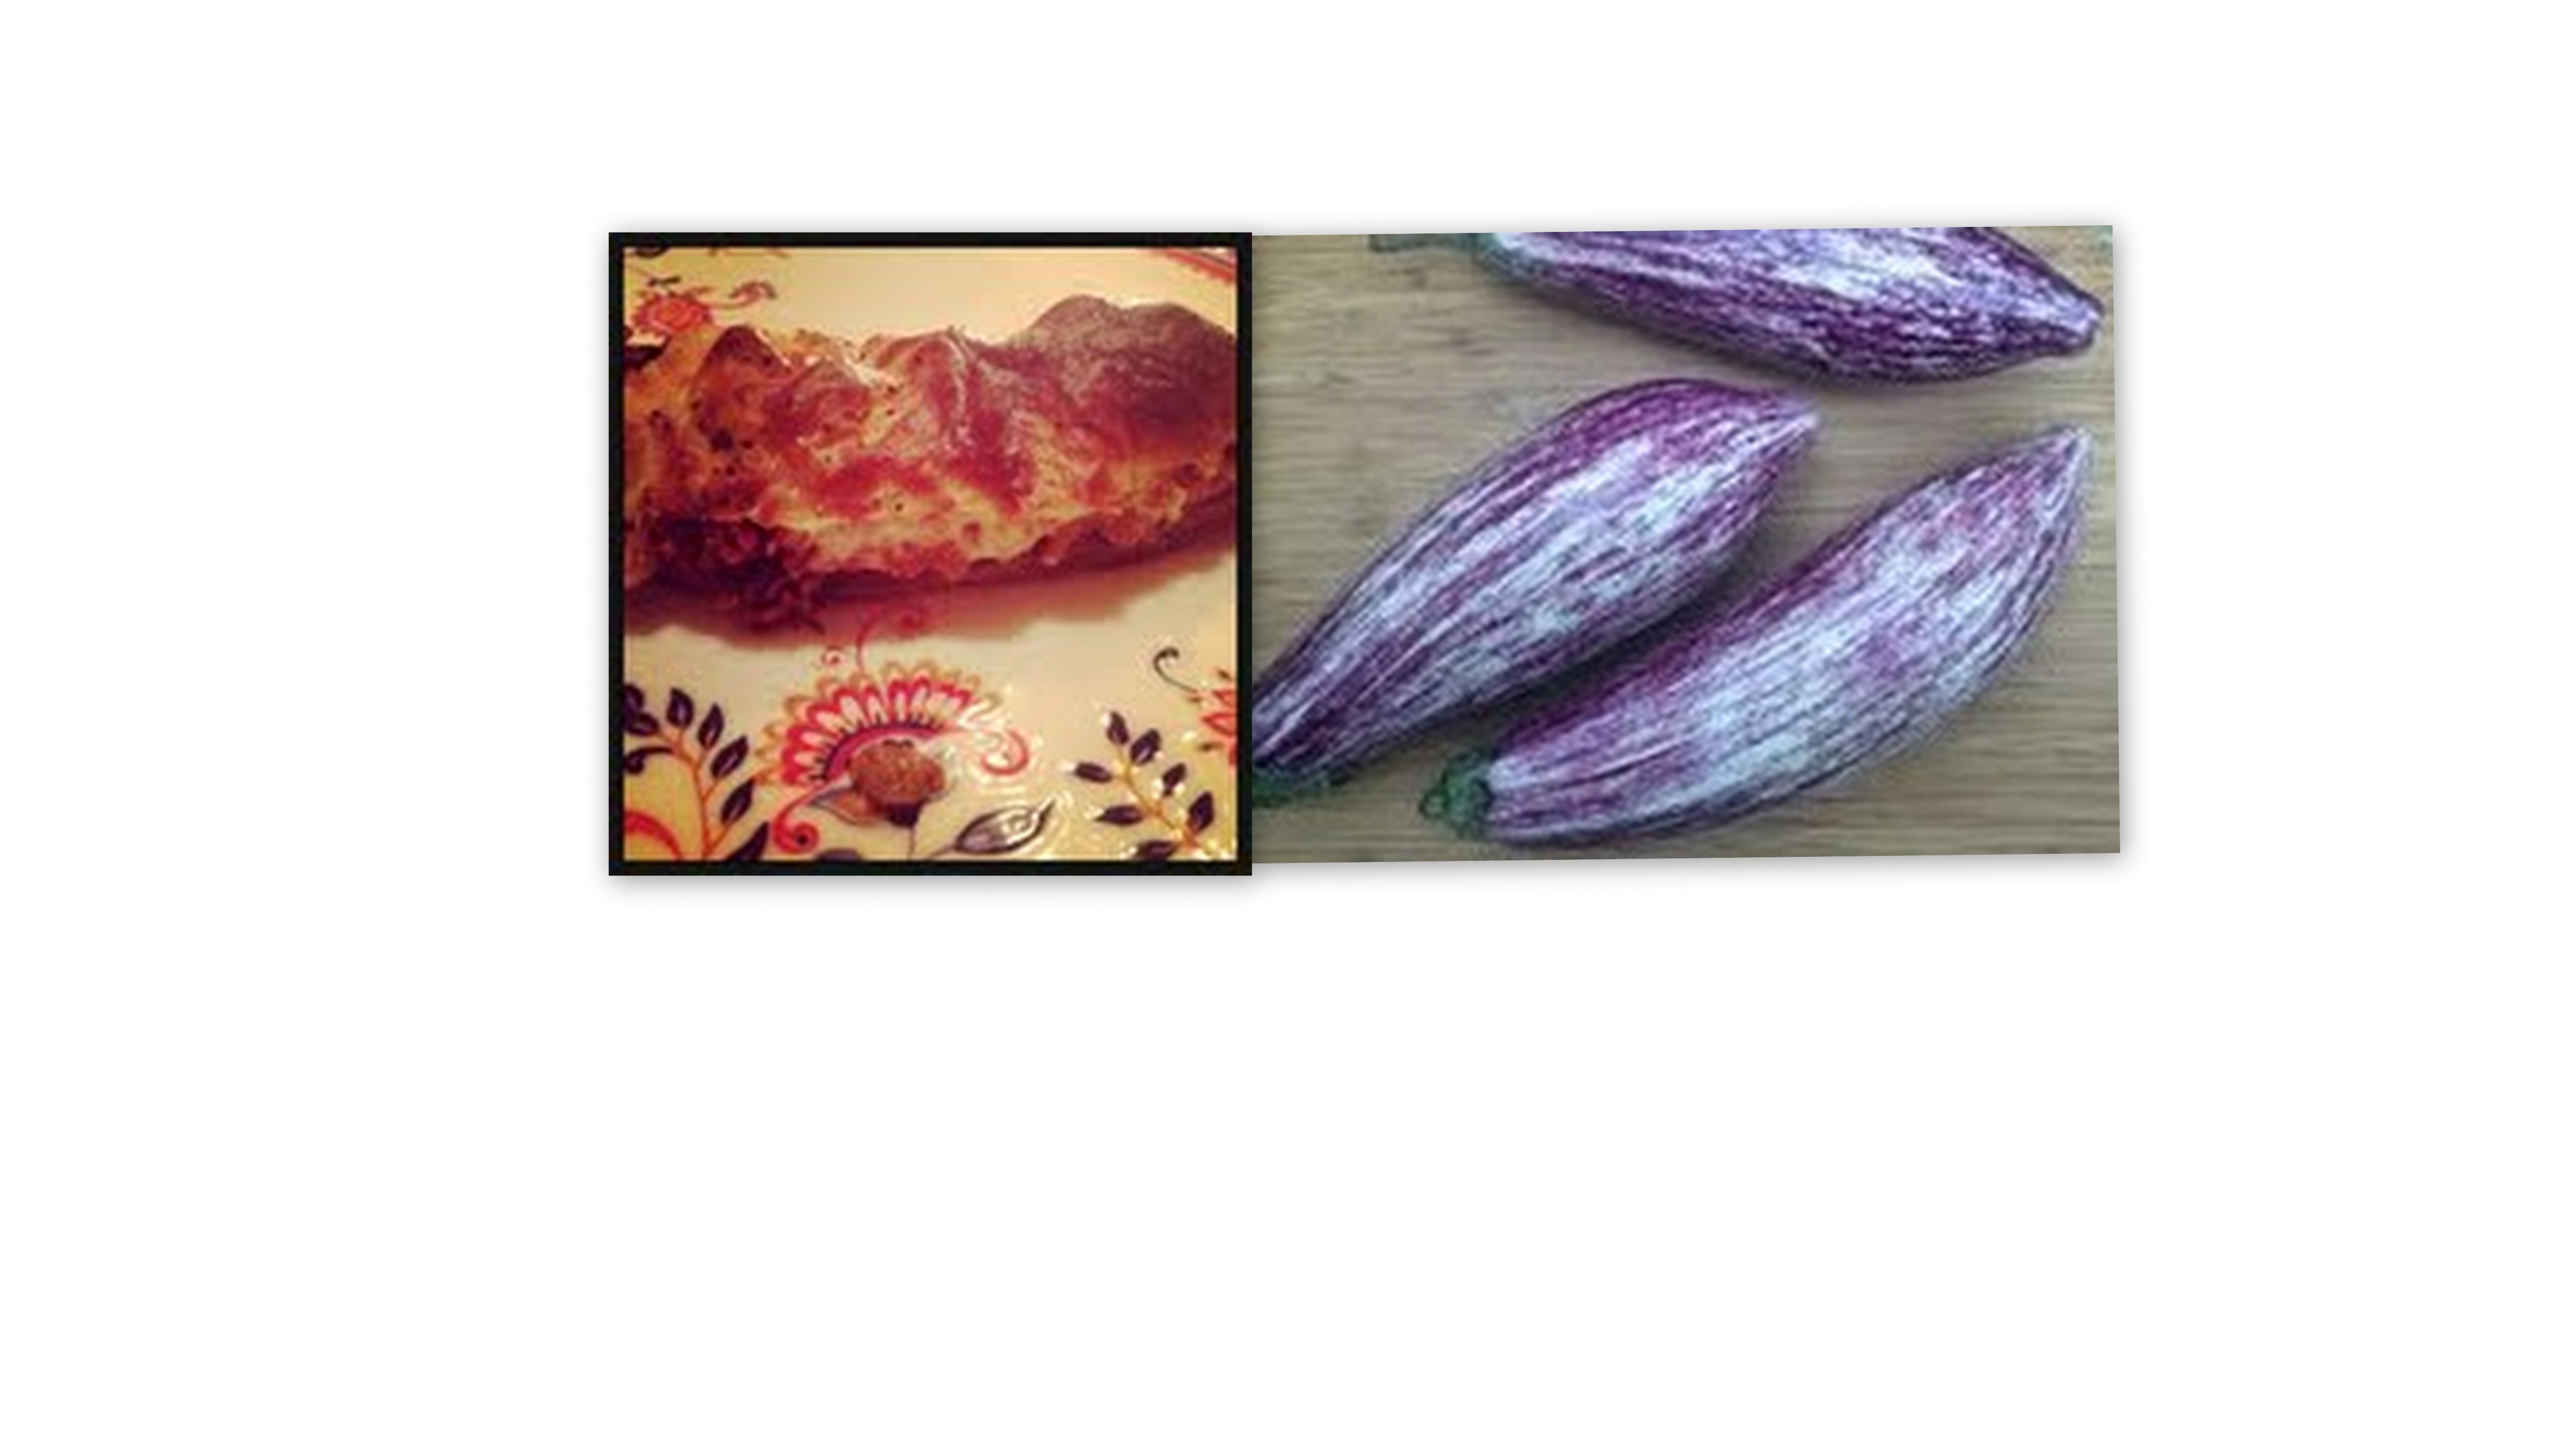
Little Shoes of Aubergine
This is one of these dishes that I loved as a kid as much as I love it now. A true family favourite at many Greek homes around the world. Little Shoes (Papoutsakia) are a Sunday special, a holiday treat and a more indulgent version of the know Imam Bayildi.
Below is a recipe that might convince you that Little Shoes are as easy to make as lasagne, or a pasta bake, if not easier. Little shoes can easily be transformed to a vegetarian version as suggested below. If you are vegan you can remove the béchamel and still have a very tasty special dish. If you use plain wheat free flour for the béchamel you can have a dish for your wheat intolerant friends. This dish can be easily adapted to your taste and needs.
Ingredients
The little shoes
1kg medium sized Aubergines (preferably Tsakoniki akaΤσακώνικη)[1]
The Filling
500gr Quorn mince (or 700gr minced beef for a non-vegetarian version) [2]
3 small onions, finely chopped
2-3 garlic cloves, finely chopped or crushed
1 cup of dry white wine
2-3 tomatoes or 1 tin of chopped tomatoes
1 bunch of parsley , finely chopped
The Béchamel
4 cups of milk
1 cup flour
50gr butter
1-2 eggs
Tspn ground nutmeg
1 cup of cheese (graviera or pecorino are preferable)
salt and pepper
Preparation
The Filling
Sauté the onion in a little olive oil with a pinch of salt until nearly translucent.
Add the Quorn or meat mince, season with salt and pepper and stir fry. [3]
For the Quorn mince add a little more oil so that it does not stick to the pan.
For the beef mince keep stirring so that the mince remains separated and evenly browned.
Add the wine and stir for a couple of minutes.
Add the chopped tomatoes, the garlic and the parsley, stir, cover and cook.
The filling is ready when the mince has absorbed all the liquid but is not dry.
This should take approximately half an hour for quorn and a bit longer for the meat version.
The Aubergines
Wash the aubergines, cut the stalk end off and slice in half lengthwise.
Bring a deep pot of water to the boil, add the aubergines and boil until they are slightly soft (5-10min).
Drain and cool down.
Lay in a baking tray skin down and with a sharp knife cut a cross shape in the fruit’s flesh
Pull open to create enough space for filling.
The Béchamel
Prepare the sauce whilst the sauce is still cooking and use a cooking whip for stirring [4]
Add the milk to the pan and stir in the flour making sure it is well mixed with no lumps [5].
Place on medium heat and bring to the boil stirring more as the temperature rises.
When the sauce starts simmering lower the heat, add the butter and stir continuously.
Add nutmeg, salt and better and a whipped egg.
Continue stirring on low heat until the sauce thickens.
When removed from heat keep stirring, add the grated cheese and mix well.
The baked dish
Add the filling to the aubergines evenly.
Spread the béchamel on top of the filling.
Bake in a preheated medium temperature oven until the béchamel is golden (about half an hour).
Rest and cool down for 15 minutes before serving.
Notes:
[1] 1kg of aubergines should be 5 medium pieces of the tsakoniki, flask variety. You can cook this disk with the normal aubergine but the tsakoniki variety is much nicer with this dish and cooks faster.
[1] 1kg of aubergines should be 5 medium pieces of the tsakoniki, flask variety. You can cook this disk with the normal aubergine but the tsakoniki variety is much nicer with this dish and cooks faster.
[2] 500grof quorn make more filling than 500gr of minced beef so you might be able to fill an extra pepper.
[3] You can add the Quorn mince frozen to the pan. This should take a few more minutes than when your mince is defrosted. Overall cooking with quorn should be faster than with meat at this but also the sauce cooking stages.
[4] I prefer a flexible wire whip when making béchamel and it helps avoid lumps.
[5] I used plain wheat free flour this time which was very easy to mix in the milk and made a very creamy sauce.
Oh sweet grain of Halva
My mother was here until last Monday, and I kid you not, she made the best halva of her mother career for us. It was one small little change in the simple foolproof recipe that she has been using all her life- she used lime instead of lemon and oh my was that a wonderful deviation.
The halva recipe follows the simple 1-2-3-4 rule, which is fool proof and depending on your unit of measure allows you to make more or less portions of halva. If you use a cup as a unit of measurement you should have enough desert for about six people.
Remember to allow some time for the halva to cool down slightly so that you can mould it into your chosen shape or individual portions.
This desert is easy, quick, cheap and everybody loves it. And the recipe is vegetarian, vegan and dairy free.
Here is how we do Halva in the Moutselou clan although admittedly I prefer to brown the halva a bit more than mom because of the toasted grain smell it releases in the house.
Ingredients
1 measure of olive oil
2 measures of coarse semolina
3 measures of sugar (you can easily reduce that to 2 or even replace with honey)
Peel of half or whole lime or lemon
1 cinnamon stick
A big handful of chopped walnuts
Some finely chopped walnuts for dusting and decoration
Some cinnamon powder for decoration
Preparation
Prepare a syrup adding the boiled water, the sugar, a cinnamon stick and lime or lemon peel to a heat proof bowl or pan.
Stir the sugar until dissolved, cover and let it sit long enough to unleash the lime and cinnamon flavours[i].
Heat the olive oil in a pan (preferably non stick) until it’s almost sizzling.
Add the semolina to the pan and brown, stirring continuously and until it reaches your preferred shade of semolina brown[ii].
Add a big handful of coarsely chopped walnuts halfway through your browning action.
Remove the lemon/lime peel, stir the syrup in the pan of browned semolina and either remove from heat or lower to minimum whilst you continue stirring.
Remove from heat and discard the cinnamon stick.
Let the halva mixture cool down for five minutes or more.
Mould either in a bundt cake tin or a loaf tin or in individual moulds of your choice, e.g. Greek coffee cups for smaller portions.
Dust with cinnamon powder and decorate with finely ground walnuts and.
Let the halva cool down before serving. The halva is delicious cold when left in the fridge overnight.
If you wish serve with grapes and decorate with single (soya) cream
Suggestions
[i] The longer you leave your syrup to sit the more flavoursome it will be but if you are in a rush you can just let it sit whilst you go through the next few steps.
[ii] Many people like to toast the semolina very slightly and until it absorbs the oil- if you prefer this your halva can look very pale and almost beige and could be very light. I love to brown the semolina to a heavier complexion but I would recommend a light tan for most beginners.
[iii] You will see the semolina expand.

Petra and a Chickpea and Kale curry recipe
Posted on Updated on
How did Petra and her recipe enter my life? How do you summarise a friendship?
This slideshow requires JavaScript.
I will never forget the first time I saw Petra’s smiley face in the corridors of City and Regional Planning, Cardiff University, when she came over to Wales as a visiting researcher. I remember long nights with emotional conversations and loud laughter. I remember dancing at the Toucan on St Mary Street and Journeys on Clifton Street.
In August 2011, I found Petra again. Crete returned to me a friend, as well as serenity and a sense of home. But then again that is also what a good friend gives. I hugged Petra tightly after 5 years during which our individual journeys were coinciding and sometimes merging in the ether, without us knowing: searching, coping, understanding and finding.
In Crete, the land that generously offers good food and sun, we met and talked about food, love, life and dreams again. It’s good to be reminded of all that bonds you deeply with another person.
My friend Petra loves food, cooking and life. She is also a rural sociologist who is passionate about sustainable food and approaches the subject from a cultural angle: understanding cultures and consumerist patterns, and changing attitudes. She teaches and researches at the University of Wageningen, the Netherlands and build a ‘Food Cultures and customs’ course in 2010. And last year Petra was also a part-time organic farmer for the growing season. What a woman!
Petra writes for a couple of blogs: the rural sociology group blog, university of Wageningen and Pure Food links, a sustainable food network blog. Recently, she visited Brasil and, in a couple of entries at the end of October and November 2011, she tell us about national school food programmes, and particularly Dos Irmáos School ,the Rio Grande do Sul, which she visited. Legislation requires that 30% of fresh produce used in school food comes from local farms: shortening the supply chain with various possible good impacts for the environment, economy, etc. springing to my mind at first glimpse.
Apart from the curry she recommended this month, when I think of Petra and food two dishes spring to mind: garlic and chilli prawns served with fresh bread, and roast lamb. I remember a roast lamb dinner when suddenly it dawned on us that everyone around the dining table was a Libra, with the exception of me who was born on the cusp: what a strange coincidence that so many of us hanging out regularly, making lasting friendships, were born within a month of each other either in the same year or a couple of years apart either way.
I adapted Sarah Raven’s chickpea curry recipe recommended by Petra and whilst cooking her felt presence in Cardiff once again.
Ingredients
Preparation:
Tip: I froze a couple of portions of the curry and save for yummy lunches this week. This dish was as delicious when defrosted and consumed two weeks after I cooked it.
Share this:
This entry was posted in Comment, Recipes and tagged Brasil school food programme, Cardiff, Cardiff University, chickpea and kale curry, chikpeas, coconut milk, coriander, curly kale recipes, curry powder. spice of life, food, food blog, food photography, ginger, kale, lime, mushroom recipes, Petra Derkzen, Prof Terry Marsden, recipes, Roath park, rural sociology, Sarah Raven recipe, shrimp paste, Splott, Tom Woollam, university of wageningen, vegetarian.